Posts

Showing posts from August, 2019

How to Create and Set up Hotspot in Windows 10 PC
Image
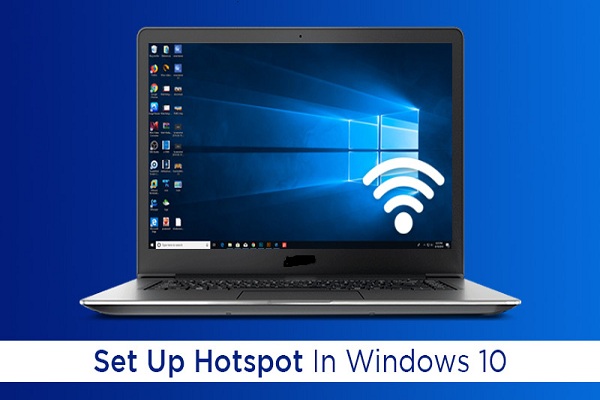
Just like smartphones, your Windows 10 PC can share an internet connection with other devices as well. It’s not limited to a type of connection you can share. Moreover, you can connect and use your Windows 10 hotspot on multiple devices at a time. If you want to prevent unwanted users, it also gives an option to set up a password for your hotspot. Here is how to create and set up a hotspot in Windows 10 PC. Steps to create and set up a hotspot in Windows 10 PC: 1.   Start your Windows 10 system. 2.   Now, click on ‘Start’ at the bottom left corner, or simply press ‘Windows’ key on the keyboard. 3.   After that, click the ‘Cog’ icon above the Power icon. This will open the Windows 10 Settings. 4.   Go into the ‘Network & Internet’ settings by clicking on its tile. 5.   Look for the ‘Mobile hotspot’ under the left-hand side pane, and click on it. You’ll find it near the bottom in the column, and this will open the Mobile hotspot settings on the right side. 6.   Cl

How to Change the Screensaver on your Apple TV?

Image
Apple TV is a powerful and feature-packed smart TV. You can customize your TV by adding a screensaver. If you are bored with the old screensaver, then read on and learn how to set up a new one.  Changing the Screensaver on your Apple TV If you want to change the screensaver on Apple TV, you should follow the instructions given below. First, you have to launch the Settings application on your Apple TV. After that, you should choose the General option in the settings section. Then you have to choose Screensaver option. Thereafter, you should choose “Type.” Later, you can select any option for the screensaver. Changing Screensaver Transition You can change how the screensaver transitions on your Apple TV. Here are the instructions given below. Get started by launching the Settings application on your Apple TV. After that, you should choose the General option in the settings section. Then you have to choose Screensaver. Thereafter, you should head towards Transiti

How to Create an Exe File?

Image
Any file which ends with .exe refers to a software which runs a program when opened. EXE files contain executable programs for Windows OS. This file extension is normally used by Windows programs. In this blog, we will discuss the process of creating EXE files. Create an EXE File If you want to create an Exe file. You need to follow the steps given below. ●        Firstly, you have to click on the Windows Start logo on your desktop. ●        Then you should go to the search bar. ●        After that, you have to enter "notepad" into the search bar. ●        Thereafter, you should click on "Notepad" from the results. ●        Later, you have to input the EXE's program code. ●        Now, you should click on File option from the menu bar. ●        After that, you have to click on "Save As" from the drop-down menu. ●        Then you should click on "Save a type" from the drop-down box. ●        Thereafter, you

How to Delete an App from your Mac

Image
There is a big difference in standard laptop and Macbook. Both have the different software and features. Macbook has a different operating system. It runs on the OS X operating system of Apple, whereas standard laptops are running on the Windows operating system. Both of these have the different functions. So, for a new user of Mac, it may be difficult to perform some actions. If you are an old user, over the time your device gets full of lots of apps that you no longer use or stopped working on. To get rid of these apps you need to remove them from your device. There may be different reasons for deleting an app. You can delete an app directly from your Dock. Follow below-mentioned steps: 1.     Click & hold the app icon you want to remove. 2.     Drag the app icon to the Trash Bucket icon and release it. Now, your app will be in the trash. For permanently deleting the app, follow these steps: 1.     Open the Trash ‘Bucket icon’ on your Dock. 2.    

A Step by Step Guide On Installing Dropbox In Ubuntu

Image
Installing Dropbox in Ubuntu is not a difficult task like it seems. Dropbox is an online file hosting which enables users to share files between computers with the cloud. Dropbox installation is quite easy on most of the platforms except Linux Ubuntu. Users find it very difficult to install Dropbox in Ubuntu because of its different process. Dropbox installation process in Ubuntu is not as difficult as it seems but is slightly different. If you are one of the users facing inconvenience in installing Dropbox on your Ubuntu software system then you have come to the right place. Here is a detailed step by step guide on installing Dropbox in Ubuntu. Step 1 First of all, sign up for Dropbox as it requires an active account to activate. Go to the official website of Dropbox and click on Sign up. Step 2 After clicking on the sign up option, fill in the details it asks to create a dropbox account successfully. Most importantly, create a secure and heavy password for your account

5 Best Alarm Clock Apps In 2019

Image
Waking up early in the morning or at a fixed time every day is not easy for heavy sleepers. Sometimes you are way too tired after a busy day and cannot wake up at your morning fixed time. And snoozing your alarm multiple times makes you late for work and other important events. You do not have to worry if you are one of those heavy sleepers out there. I have shortlisted some of the best alarm clock apps for your convenience.; 1. Alarmy Alarmy is considered to be one of the best alarm clock apps in more than 80 countries in the world. The app features a photo mode in which you will take a photo of a registered place to turn off the alarm. The app makes sure there will be no more late mornings for you.  The app is designed in a way to wake you up most effectively and harmoniously. 2. Google Assistant Google Assistant is amongst the most popular apps which avail features such as reminders, calendars, important dates, and alarm clocks. The app allows you to set the alarm at t

How to Fill An Area with Color in Photoshop

Image
If you want to fill large areas on a picture by adding solid colors, then you can use the drawing and painting tools. You can use these tools, but it is  possible to do this procedure much faster in Photoshop. If you want to add the solid colors while working in Photoshop, then you can use the background or foreground colors. The below-mentioned steps will tell you how to fill an area with color in Photoshop. Steps to fill an area with color in Photoshop using the Paint Bucket tool ·        Turn on the Color Picker option. ·        You need to go to the color given in the taskbar. ·        Search for the color which you wish to use. ·        Choose the color. ·        After that, choose the shade from the colors menu list. ·        Press on the Ok button. ·        Choose the Paint Bucket tool. ·        Click on the G key is given on the system keyboard. ·        In case it does not work, then use the tool given in the same taskbar. ·        Click on the Sh